A little technical help for owners of motorhomes, boats and caravans.
A few notes for those who would like more information about choosing and installing a rigid or semi-flexible solar panel system in any 12 volt environment. This includes motorhomes, boats and caravans.
These straightforward notes cover the best types of solar panels to use. We will also provide information on solar panel charge controllers, and all the other components you will need for your solar panel system.
1. Which solar panel should I choose?

Always use solar panels with monocrystalline cells. This is the best technology for 12 volt charging applications. Monocrystalline is the most efficient cell material in common use.
Other cell technologies include polycrystalline silicon and amorphous silicon which are not as efficient and are now very out of date.
Rigid aluminium framed solar panels
These are the most commonly available style of solar panel. They have an aluminium frame and are the most economical type. Use these panels whenever possible . They come in a range of sizes and carry the longest guarantees. They are strong, easy to fit and extremely weather resistant.
Semi-flexible solar panels

SunWorks Premium semi-flexible solar panels
Semi-flexible solar panels are useful if you want to mount the panel on a curved surface. This could be the deck of a boat or the roof of a motorhome or caravan.
If you are looking for a semi-flexible panel make sure it is of the monocrystalline type. These panels have the same efficiency as their rigid counterparts. The best semi-flexible panels are reinforced with aluminium plates and have tough ETFE coatings. Make sure your panel has these features if you want it to last.
Using semi-flexible panels on a boat
If you intend using a semi-flexible solar panel on a boat, the aluminium back-plate will allow the crew to walk occasionally on the panel in soft shoes. Also mount these panels on cabin sides, bimini-tops (with Velcro), wheel-house roofs or spray-hoods. These reinforced panels will give a long, reliable life.
If you need a solar panel that can be walked on regularly have a look at the Solara range of marine solar panels.
Marine quality solar panels

Solara marine solar panels
Many boat owners will want to know if they can walk on their solar panels. This depends on how well the panel is built and how they are fixed to the deck. Both our Premium semi-flexible solar panels and the Solara marine panels can be walked on when installed correctly. The panel must be firmly bonded to the mounting surface. The surface must be solid, non-deformable, even and rigid. There should be no airgaps under the solar panel.
Our Premium range of semi-flexible panels can be walked on occaisionally if the above mounting advice is used. These panels represent a good standard of marine solar panel and can be used in most marine situations. They are only 4mm thick and can be bent to a maximum of 10%. The dark grey surface colour extends to the edges and is particularly attractive. These panels can be glued to the deck of a boat with a suitable adhesive.
Solara marine panels
For the ultimate in rugged solar panel systems for yachts, take a look at Solara marine solar panels. Solara M-Series are one of most successful solar panels in use for maritime applications. Only 4mm thick and built to withstand the harshest conditions.
Solara panels have been used during several Vendée Globe races. Many skippers sailing around the world rely on Solara quality. They are suitable for all yacht and boat applications. They are used on off-shore platforms, buoys and life-rafts.

SunWorks SB1C charge controller with LCD display
2. Solar panel charge controllers.
Your solar panel system must have a charge controller to ensure complete and safe battery charging.
A good quality charge controller will:
- protect your battery against overcharging
- maximise the charge into your battery
- prolong your battery’s life
A poor quality charge controller will steadily damage your batteries, costing you more in the long run.
The heart of the system
We consider the charge controller to be the most important part of the solar panel system.
SunWorks charge controllers are well known for performance, appearance, and ease of use. We design and build our controllers specifically to meet the needs of 12 volt solar system applications. They are ideally suited to boats, motorhomes and caravans.
Our unique PWM and DuoPWM charging method will keep your batteries in peak condition and extend your battery life.

SunWorks dual battery charge controllers
The best selling SunWorks charge controllers have a no-nonsense LCD display to keep you informed about the performance of your solar panel system and the state of your batteries. The display shows you exactly how much current is flowing from your solar panel. You will also see the voltage of your battery increase steadily as it charges up.
With a choice of colours, and using our concealed wiring arrangement, these controllers will enhance the interior of any motorhome, yacht or caravan.

The SunWorks range includes single battery controllers and dual battery controllers. A dual battery charge controller will charge your domestic and engine batteries from the same solar panel. Our dual battery controllers use SunWorks’ unique DuoPWM charge system ensuring that both batteries are optimally charged. A special ‘winter mode’ prevents either battery from falling too low in low-light or out-of-season conditions. Perfect if you have equipment connected to your engine battery such as an alarm system.
Fixing a solar panel system to your roof or deck

Solar panel uPVC mounting pads
With the right accessories attaching your solar panel is straightforward. If you intend fixing the panel onto a flat surface such as a motorhome roof then your task is made easy by using our uPVC corner mounts. Glue these mounts to the roof or deck using Sikaflex 252i adhesive.
For fitting to a boat or yacht, we recommend using Z-brackets. Made from robust aluminium, these brackets are screwed or glued in place.
To mount a rigid solar panel to a boat’s pushpit or any other type of structure, the aluminium frame of the panel can be easily drilled to take screws or bolts.
 Narrowboat owners may also be interested in our adjustable mounting frames. Using this frame you can tilt the solar panel up to directly face the Sun. This substantially increases the yield of electricity, especially during the winter months when the Sun is low in the sky.
The frame is made from strong aluminium sections. It can easily be adjusted to any angle. Available in two sizes these frames can be fitted to a curved deck using our adjustable mounting feet.
Semi-flexible solar panels can be attached using the correct adhesive or double sided tape. It is very important to use the correct adhesive or double sided tape. Please contact us for more details.
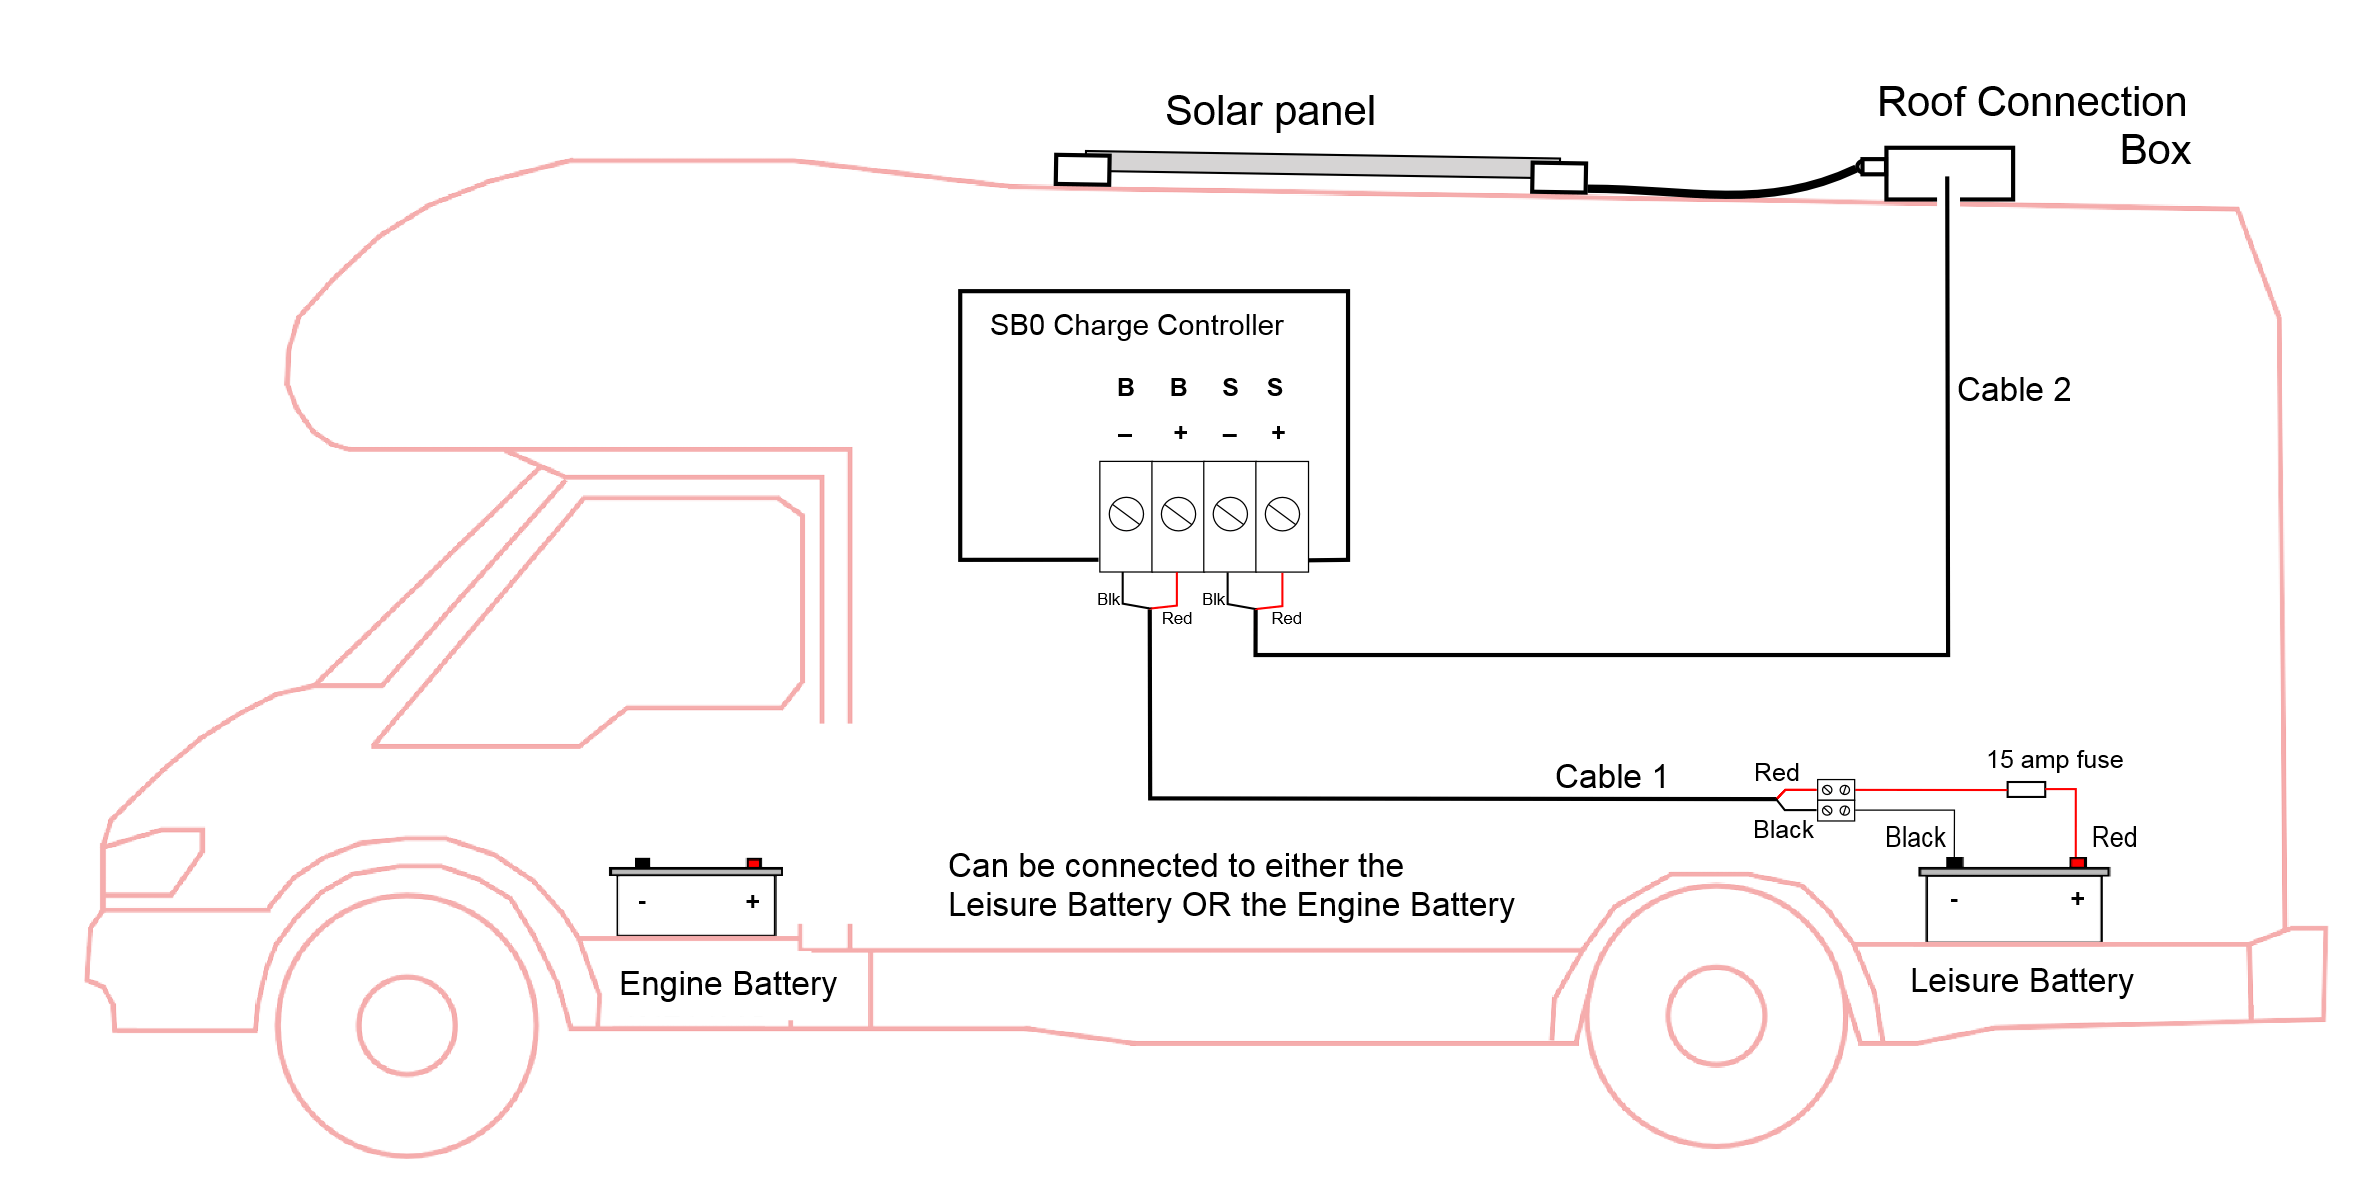
3. Connecting up. It’s easier than it looks!
The solar panel is connected to the battery via a charge controller and a fuse. The charge controller, battery and fuse are inside the boat or vehicle. See cables 1 and 2 in the diagram. There are two connections to the battery and two connections to the solar panel. It’s as simple as that!

Watertight roof or deck gland.
Holes in the roof or deck
The cable from the solar panel has to pass through the roof or deck to the charge controller. We recommend that you use a watertight connection gland.
The gland covers the hole you make in your roof or deck and is sealed in place using adhesive. This provides a very reliable and watertight solution.
Solar panels are supplied with either a 2-core cable, or two separate wires fitted with MC4 connectors. A 2-core cable can be passed directly through the roof/deck gland.
If the panel has two separate wires you can remove the MC4 connectors and use a 2-way roof/deck gland. Alternatively you may prefer to connect the two solar panel wires to a SunWorks solar cable which has matching MC4 connectors. The resulting single cable can be passed through the gland and onto the charge controller.
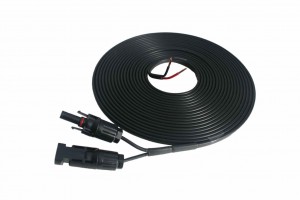
Solar cable with MC4 connectors
You can also make the connection through the roof or deck using a watertight connection box. Glue the box to the roof or deck with suitable adhesive. The box provides a less streamlined appearance but may be more flexible if you intend extending your system at a later date. The MC4 connectors can be removed from the solar panel wires and passed into the box. The two wires can be joined, within the box, to a 2-core cable using a terminal block. The 2-core cable is then passed through the hole in the base of the box and connected to the charge controller.
Which cable should I use?

Watertight connection box.
Whether you use a box or a gland, the wiring is made much easier if you use a 2-core cable. Make sure the cable is double insulated and has a pair of red and black wires so that you can easily distinguish the positive and negative connections.
You should always use an automotive grade cable. These are much more flexible and smaller in section than standard cables. They are also excellent at absorbing vibrations and shocks.
We recommend twin core automotive cable of 2.5 sq mm section. This will handle systems of up to 250 watts without excessive power losses or voltage drops.
If your total solar panel output is more than 250 watts or your total cable length is more than 10 m, you may have to use a larger cable section. Please contact us for more details.
4. Extending your solar panel system.
Extending your solar panel system is always possible. Adding another solar panel will increase the amount of electricity produced. Your battery will therefore charge up more quickly.
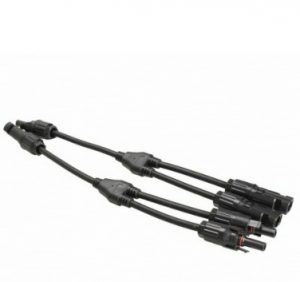
Y-branch connector. Connects two panels together.
Make sure that your charge controller can handle the extra electrical current. If you are unsure about what size of charge controller you should have, please get in contact with us.
The additional solar panel must be connected in parallel to the existing panel. This means that the positive wire of each solar panel is connected together. The negative wire of each solar panel must also be connected together.
If you have used a roof connection box, remove the MC4 connectors from the new solar panel and pass them through into the box. Make the connections to the existing solar panel, inside the box.

Fused battery harness
Additional solar panels can be added by using a Y-branch connector. The Y-branch connector allows the cables from two solar panels to be easily joined together using the existing MC4 connections.
Fusing the solar system.
There MUST be a fuse between the charge controller and the battery. See the diagram above.
To the fit the fuse and to make the connection to your battery easier, have a look at our fused battery connection harness. This has the battery connections and fuse holder already attached.
The harness is supplied with full instructions and the correct fuses.
There is no need to fit a fuse between the solar panel and the charge controller.
If you would like more technical information regarding the solar panel system for your motorhome or for your boat, please contact us:
Tel: 020 8144 2475
Email: [email protected]

